Published with Blogger-droid v1.6.5
Showing posts with label crafty. Show all posts
Saturday, December 4, 2010
curtains are complete!
The entranceway curtain project is complete. I am hoping that these curtains will save us some money and heat by closing off the front door. I still have a bunch of necklaces to post so that should be coming early this week. Have a great weekend!
Labels:
crafty,
creative spaces,
Decorating,
Decorating-How to,
Lifestyle,
tips
Friday, December 3, 2010
putting the last two panels together
I will definately make these curtains again however it will be a bit easier with different fabric. This crushed silk is a bear but it is forgiving as much as it is a pain, however a bit time consuming. It doesnt help that i am blogging to procrastinate...peace out finishing project; engage!
Published with Blogger-droid v1.6.5
Labels:
crafty,
creative spaces,
Decorating,
Decorating-How to,
Lifestyle,
tips
Tuesday, November 30, 2010
Tuesday, November 23, 2010
Charm/Trinket making project
I am gearing up to have a little table set up at one of the nearby schools so I have been working on my new concepts for my necklaces. I have sketched up several different styles but have decided to include one single element and that is these charm type pieces that I am going to work into and with chain and ribbons. In order to get a bunch of necklaces ready I need a bunch of these so I have started cranking them out, once you get in the swing of things you really get going. I love all the colors and textures, stay tuned for more updates and soon some finished pieces.


too much water not enough fire
So long story short I think that we have some spirits hangin out in our house so a friend of mine who works with energy came to town and helped evaluate our house as well has give us some ideas of how to change the energy flow. My kitchen was one area in which we needed to improve upon, the answer, more red by the sink and window. We need to balance the water element with some fire. Lucky for me i was able to find some fabric that incorporated my existing color palette. Here you see the fabric i will use to sew some new curtains. It is amazing what a little fabric with some color can do.
Published with Blogger-droid v1.6.5
Labels:
crafty,
creative spaces,
Decorating,
Decorating-How to,
Lifestyle,
tips
Monday, November 22, 2010
Sunday, September 5, 2010
Food to Keep you Fueled
So I have been craving this wild rice salad that my mom used to make and I didn't realized how much I took for granted the midwest and their awesome foods! I have bought wild rice twice recently at two different grocery stores and it is amazing because they have 1 kind, no variety and it is soooo expensive. I may have to have someone from back home send me some wild rice because this is ridiculous!
Anyway enough with my ranting! I decided to add a few things to the original recipe and take some out, ok I only took out one ingredient and that is the peas. I did added a purple pepper and some chives.

My husband made a nice dressing but you can use store bought italian if you are so inclined.


Here is the finished product ingredients are
We are going to have a fall garden including spinach, lettuce (a few kinds), potatoes, garlic and some parsnips. We should get a small harvest from the leafy greens before it frosts and everything else will be in the ground ready for the spring, at which time we will fill the rest of the garden beds with our favorite vegetables.
I need to get the seeds in this week and in order to do that, we need to get more dirt as we are using raised garden beds. I am amazed at how quickly we executed this project as I had only just seen the garden that inspired me to do this:


I saw this garden on a walk last week and fell in love! I can't wait for next year when I can get it all laid out.
Here is the finished product ingredients are
- wild rice (chilled)
- grape tomatoes cut in half
- celery
- onions
- chives
- purple pepper
- marinated artichokes
- dressing, something of the italian variety.
We are going to have a fall garden including spinach, lettuce (a few kinds), potatoes, garlic and some parsnips. We should get a small harvest from the leafy greens before it frosts and everything else will be in the ground ready for the spring, at which time we will fill the rest of the garden beds with our favorite vegetables.
I need to get the seeds in this week and in order to do that, we need to get more dirt as we are using raised garden beds. I am amazed at how quickly we executed this project as I had only just seen the garden that inspired me to do this:
Friday, August 20, 2010
Outdoor Studio Work is the Best
As I am often times most creative in the morning I grabbed a few supplies to continue work on Project Bedroom Artwork and brought it outside to enjoy the lovely breeze! However, not too good of an idea working with paper in the wind, but what can I say I love a challenge! Here is what I am working on today. I would love your feedback and comments.


Wednesday, August 18, 2010
Various Stages of the Artwork for our Bedroom
Here is a sampling of the pieces of artwork I am working on for our bedroom. As you can see I am using a bunch of different materials and they are in various stages of completion. So far I am happy with the progress as well as how things are turning out. You truly never know how something is going to turn out until it is done!


Monday, August 16, 2010
Project Artwork for Bedroom!
I have had different ideas of big projects I was going to do regarding artwork for some area of our house. The ideas have melded over the years and I finally think that I can put some of this together for the artwork that will fill our room. I have always been a big fan of positive negative and to completely different things coexisting within the same space. I am taking a bunch from nature but all bringing in the elements of the city. Using different textures to accomplish this will be the fun part!
I got some shims and some half sheet plywood that I am cutting down for frames and bases for some of the work that I am putting together.

When I got the plywood I also perused through the aisle to see what other random things I could find and get inspired by. Here is a collection of the things I will be using.
My curiosity lays into when this will be done! So far it is going rather smoothly and I am hoping to continue this pace!
Friday, August 13, 2010
Curtains have been Created...with only a few hiccups!
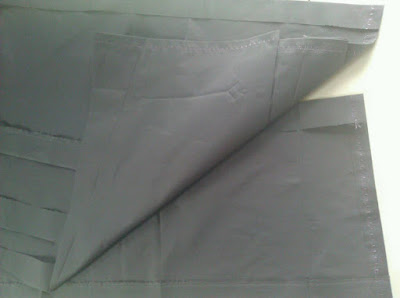
Yesterday afternoon when all my curtain assembling materials were obtained, I moved on to measuring and cutting. Every time I cut fabric I wish that I would have cut it at the store where I could get a straight line, until I realized that my awesome collapsible ikea table would serve the purpose for a straight guide for my scissors.

Then I moved on to pinning the sides and also ironing a crease to hold a nice straight edge for sewing. I did this to both curtains and then spent several trips into the steamy attic to look for the sewing machine. On my third sweep through the attic I decided I was going to go rubbermaid by rubbermaid until I found the damn thing. At one point I threatened to buy another one, until I found it at the bottom of a laundry bin...

I get everything all set up, get the tunes going, have the bobbin in place and start to sew. Well, for about a second, when the bobbin kept effing off (for the lack of a better term) over and over and over. Usually I am able to get it going for a bit but this was getting ridiculous, I could have been done by now...

So I headed over to our lovely walmart and bought this new Project Runway addition sewing machine. Pretty funny huh? I bring it home check out the manual and fire this puppy up. The bobbin system is so much easier to deal with because you can see what is going on and the stitch is unbelievable. I zipped through these curtains in now time flat.

Stella enjoying the sun poking through her new curtains.

Overall this was a successful project! The fabric was a super good price, nice thickness and an easy pattern to work with. It was super easy to have both of the curtains matching without having an excess of leftover fabric.
Today, I am off to get some knobs, a better tie back solution, and some ideas for framing the artwork for the walls.
Then I moved on to pinning the sides and also ironing a crease to hold a nice straight edge for sewing. I did this to both curtains and then spent several trips into the steamy attic to look for the sewing machine. On my third sweep through the attic I decided I was going to go rubbermaid by rubbermaid until I found the damn thing. At one point I threatened to buy another one, until I found it at the bottom of a laundry bin...
I get everything all set up, get the tunes going, have the bobbin in place and start to sew. Well, for about a second, when the bobbin kept effing off (for the lack of a better term) over and over and over. Usually I am able to get it going for a bit but this was getting ridiculous, I could have been done by now...
So I headed over to our lovely walmart and bought this new Project Runway addition sewing machine. Pretty funny huh? I bring it home check out the manual and fire this puppy up. The bobbin system is so much easier to deal with because you can see what is going on and the stitch is unbelievable. I zipped through these curtains in now time flat.
Stella enjoying the sun poking through her new curtains.
Overall this was a successful project! The fabric was a super good price, nice thickness and an easy pattern to work with. It was super easy to have both of the curtains matching without having an excess of leftover fabric.
Today, I am off to get some knobs, a better tie back solution, and some ideas for framing the artwork for the walls.
Labels:
crafty,
creative spaces,
Decorating,
Decorating-How to,
Design,
environment
Thursday, August 12, 2010
The Creative Process for Curtains
The more I work on projects the more I realize it is important to have a creative process to make sure that you aren't missing anything. I have been thinking about the design for our bedroom curtains and it is finally the day that I have put aside to bust these out.

I decided to make some sketches and take some notes to make sure that I was approaching this the right way. I also need to make sure that I have all the necessary supplies. When I got to thinking I realized that I couldn't make a tie back out of the material that the curtains are going to be made from, as it is very thick and wouldn't serve the look I was going for. Instead I am going to get a really thick bright ribbon that I am going to sew to the back, so it's always attached and can't get lost.

My other challenge was will this look funny if it doesn't go to the floor? so I decided to sketch it out and then of course made a phone call to my sister to see if she thought it would look ridiculous or not. She said, "no, it will look just fine."
Off to the fabric store to get some sturdy thread and a big old ribbon. The real question is will I get it all done today or will I have to wait til tomorrow to see the results?
I decided to make some sketches and take some notes to make sure that I was approaching this the right way. I also need to make sure that I have all the necessary supplies. When I got to thinking I realized that I couldn't make a tie back out of the material that the curtains are going to be made from, as it is very thick and wouldn't serve the look I was going for. Instead I am going to get a really thick bright ribbon that I am going to sew to the back, so it's always attached and can't get lost.
My other challenge was will this look funny if it doesn't go to the floor? so I decided to sketch it out and then of course made a phone call to my sister to see if she thought it would look ridiculous or not. She said, "no, it will look just fine."
Off to the fabric store to get some sturdy thread and a big old ribbon. The real question is will I get it all done today or will I have to wait til tomorrow to see the results?
Wednesday, August 11, 2010
Contract Job just about Done, New Projects getting Started
I am back from working my long days in the big city and ready to start some new projects, get the garden into shape and take pictures and notes along the way.

I have been wanting to redo our bedroom for a bit of time now and have finally found exactly what I want to do, but I don't want to put too much money into it and I definitely did not want to paint, right now. I found some great fabric at Ikea as well as a bunch of accessories for the new updated brighter bedroom. Luckily I was able to find a fabric that went with the current paint color spanish moss but also added some lighter soothing colors with an accent of brightness.

We have had the same hardware and curtains since before we were engaged so I thought swapping out the curtains would make a major change and the easiest way to add some color. But I didn't really want to swap out the hardware since it was a huge pain in the ass mounting the current ones. So I decided to go with a more convenient and thrifty plan. I am going to paint the old ones which will change the texture of the glass and the color will be updated to be a brighter, more cohesive color with the fabric I have chosen.

This is half way through my first coat of paint.


This is the finished product which I think will accent the design concept a bit better then the originals. Next plan of attack is finding a good template for some window coverings.
I have been wanting to redo our bedroom for a bit of time now and have finally found exactly what I want to do, but I don't want to put too much money into it and I definitely did not want to paint, right now. I found some great fabric at Ikea as well as a bunch of accessories for the new updated brighter bedroom. Luckily I was able to find a fabric that went with the current paint color spanish moss but also added some lighter soothing colors with an accent of brightness.
We have had the same hardware and curtains since before we were engaged so I thought swapping out the curtains would make a major change and the easiest way to add some color. But I didn't really want to swap out the hardware since it was a huge pain in the ass mounting the current ones. So I decided to go with a more convenient and thrifty plan. I am going to paint the old ones which will change the texture of the glass and the color will be updated to be a brighter, more cohesive color with the fabric I have chosen.
This is half way through my first coat of paint.
This is the finished product which I think will accent the design concept a bit better then the originals. Next plan of attack is finding a good template for some window coverings.
New Additions to the Garden
A new Lowes opened near our house recently so we went to explore...right now is the time to pick up annuals for you garden because they are great prices and you will still have a while to enjoy them until it frosts. I wanted to link back to Lowes so I went to their website and put in the name of the flower Mandeville and to my surprise they give you all the necessary info for taking care of your plant so go check it out. This is a great database for new gardeners to learn the basics and to have a photo to compare. For me that has been the hardest part is identifying what should be in the garden and what shouldn't be, ie. weeds. As good as a job the previous homeowner did in planting it, I had no clue what to do, so I have been gardening trial and error but think I am getting a grasp for it. Adding my own annuals have helped add color and also a name to search for. With the Lowes gardening website it will be easier to bookmark and catalog the plants that I have so when next spring comes around it will be easier to know what to do.
Of course no garden is complete without butterfly's so I got this bush. I have several other butterfly flowers in the garden that have long lasting bright flowers. Every year I notice more humming birds fluttering around the backyard.
Subscribe to:
Posts (Atom)